
Development in React, using TypeScript and WebPack
How to setup an initial development environment for React using both TypeScript and WebPack.
At Infi we provide software solutions that suit our customers needs. This could for example be by building an API or by building a crude user interface for simple forms and data management. Some customers however are very focused on presenting their product in a very user friendly and good-looking way. Such a frontend webapp is very suited to be built using a state of the art JavaScript framework such as Angular, VueJs or React.
At our office in Amsterdam, we have been working on a couple of such projects using React. In addition, we have also been working on a couple of mobile apps built in React Native. While working on these projects we have picked up on some tricks which we will be sharing through a couple of blogs, starting with setting up a React project from scratch. We will be providing code examples for this which will be made publicly available on our Github Page.
Before diving in however we will need to do some preparation. First off, we will need to install NodeJS, since we will need to use the Node Package Manager (npm) to install packages for our app. At the time of writing this, I’m using the latest stable version of NodeJS which is 13.12.0. The provided npm version for this installation is 6.14.4.
After the installation has finished, open a terminal and navigate to the folder you want to hold your application. In this folder, run the command npx create-react-app <app-name> --template typescript.
In the create-react-app command we provide a couple of parameters. <app-name> will represent the name of the app, which can be named at your own discretion. The --typescript parameter will initialize the app to use TypeScript instead of plain JavaScript. We tend to use TypeScript for our React projects, since the typing of methods and variables will result in cleaner code that will be less prone to typing errors. If you have never used TypeScript before, I would highly suggest checking out TypeScript in order to bring the quality of your code to the next level. If you don’t want to make use of TypeScript hoewever, you could simply leave out this parameter. (Note however that the examples inside these blogs will most likely be using TypeScript, so any changes that are needed to make your code work for regular JavaScript, have to be made by yourself).
Note that if you are using Windows, this command might fail if you have spaces in your Windows username. If this happens to you, you will have to configure the cache path using the command: "C:\Users\Firstname~1\AppData\Roaming\npm-cache" --global. Where Firstname is the first part of your Windows username, before any spaces occur.
In order to get a bit more grip on the packaging process of the application, the project will make use of Webpack. This will allow us to add loaders to pre-process files and transpile our TypeScript back to JavaScript (since the output file that can be run inside the browser will be a JavaScript file). In order to do so we will add a file called webpack.config.js inside our application folder. This will also allow us to
There are some parts in in this file that will prepare us for the potential use of SCSS, serving certain types of files and the use of hot-reloading for faster development. Note that this is not a configuration specified for use in production applications, where you would probably make specific changes for different modes, such as Development or Production, where the application can be build and use appropriate loaders for each mode or scenario.
We will use the following content for webpack.config.js.
const path = require("path");
const webpack = require("webpack");
const dotenv = require("dotenv").config();

const HTMLWebpackPlugin = require("html-webpack-plugin");

const MiniCssExtractPlugin = require('mini-css-extract-plugin');
const OptimizeCssAssetsPlugin = require('optimize-css-assets-webpack-plugin');

var outputFilename = "index.js";

module.exports = {
    mode: "development",
    entry: "./src/index.tsx",
    output: {
        path: path.join(__dirname, "dist"),
        publicPath: "/",
        filename: outputFilename,
    },
    plugins: [
        // Suggested for hot-loading
        new webpack.NamedModulesPlugin(),
        // Prevents compilation errors causing the hot loader to lose state
        new webpack.NoEmitOnErrorsPlugin(),
        new webpack.DefinePlugin({
            "process.env": JSON.stringify(dotenv.parsed)
        }),
        new HTMLWebpackPlugin({
            // Use this template to get basic responsive meta tags
            template: "public/index.html",
            // inject details of output file at end of body
            inject: "body"
        }),
        new OptimizeCssAssetsPlugin({
          assetNameRegExp: /\.css$/g,
          cssProcessor: require('cssnano'),
          cssProcessorPluginOptions: {
            preset: ['default', { discardComments: { removeAll: true } }],
          },
          canPrint: true
        }),
        new MiniCssExtractPlugin({
            filename: '[name]-[hash].min.css',
            allChunks: true
        }),
    ],
    resolve: {
        modules: [path.join(__dirname, "app"), "node_modules"],
        extensions: [".js", ".ts", ".tsx", ".scss", ".png", ".pdf"]
    },
    module: {
        rules: [
            {
                test: /\.(config)$/,
                loader: 'file-loader?name=[name].[ext]'
            },
            {
                test: /\.tsx?$/,
                exclude: /node_modules/,
                loader: 'awesome-typescript-loader',
                options: {
                    useBabel: true,
                },
            },
            {
                test: /\.(woff|woff2|ttf|eot)(\?v=[0-9]\.[0-9]\.[0-9])?$/,
                exclude: [/node_modules/],
                loader: "file-loader"
            },
            {
                test: /\.(jpe?g|png|gif|svg)$/i,
                exclude: [/node_modules/],
                loader: "file-loader"
            },
            {
                test: /\.(pdf)$/i,
                exclude: [/node_modules/],
                loader: "file-loader",
                options: {
                    name: '[name].[ext]',
                },
            },
            {
                test: /\.(sa|sc|c)ss$/,
                exclude: [/node_modules/],
                use: [
                    {
                        loader: MiniCssExtractPlugin.loader,
                    },
                    'css-loader',
                    'sass-loader',
                ],
            },
        ]
    },
    devServer: {
        inline: true,
        stats: "errors-only",
        contentBase: path.join(__dirname, "public"),
        historyApiFallback: true,
        open: true,
    }
};
Since we are making use of webpack and a couple of plugins within the webpack configuration, we need to add some dependencies to our package.json. You can obviously change the name of the app and the author in this file accordingly. In order to make things work, our dependencies should be the following:
{
  "name": "introduction",
  "version": "0.1.0",
  "private": true,
  "dependencies": {
    "@babel/core": "^7.9.0",
    "@babel/preset-env": "^7.9.5",
    "@babel/preset-react": "^7.9.4",
    "@testing-library/jest-dom": "^4.2.4",
    "@testing-library/react": "^9.3.2",
    "@testing-library/user-event": "^7.1.2",
    "@types/jest": "^24.0.0",
    "@types/node": "^12.0.0",
    "@types/react": "^16.9.0",
    "@types/react-dom": "^16.9.0",
    "@types/webpack-env": "^1.15.1",
    "awesome-typescript-loader": "^5.2.1",
    "babel-core": "^7.0.0-bridge.0",
    "babel-loader": "^8.1.0",
    "babel-polyfill": "^6.26.0",
    "css-loader": "^3.5.1",
    "mini-css-extract-plugin": "^0.9.0",
    "file-loader": "^6.0.0",
    "html-webpack-plugin": "^4.2.0",
    "node-sass": "^4.13.0",
    "optimize-css-assets-webpack-plugin": "^5.0.3",
    "react": "^16.13.1",
    "react-dom": "^16.13.1",
    "react-scripts": "3.4.1",
    "typescript": "~3.7.2",
    "webpack": "4.42.0",
    "webpack-cli": "^3.3.11",
    "webpack-dev-server": "^3.10.3"
  },
  "scripts": {
    "start": "npm run dev",
    "dev": "node start-dev-server.js",
    "build": "webpack",
    "prod": "webpack -p",
    "test": "react-scripts test",
    "eject": "react-scripts eject"
  },
  "eslintConfig": {
    "extends": "react-app"
  },
  "browserslist": {
    "production": [
      ">0.2%",
      "not dead",
      "not op_mini all"
    ],
    "development": [
      "last 1 chrome version",
      "last 1 firefox version",
      "last 1 safari version"
    ]
  }
}
To make sure we can change our code without having to restart the application every time, which will become tiring very fast, we will add a webpack-dev-server, which will automatically reload our application when we make changes to it and instantly show them to us in our browser. In order to do so we will need to add a file called start-dev-server.js containing the following lines of code:
const execSync = require('child_process').execSync;
require('dotenv').config();

execSync(`webpack-dev-server --hot --colors --port ${process.env.PORT}`, {stdio: 'inherit'});
We make use of the variable process.env.PORT in the final line of this script. In order to read the value process.env.PORT we will need an environment file. This can be done by adding an .env file. For now this file will only contain only one line, indicating the port of localhost where our application can be reached:
PORT=1234
Usually the .env file will contain variables you do not want to disclose to everyone, meaning you probably do not want to add this file to your git repository. In order to overcome this, you could generate this file and its contents using a continuous integration process, or by adding the file manually on your production environment (although the latter will be more error prone).
Finally we have to change the index.html page slightly. Webpack will not be able to resolve the %PUBLIC_URL% tags. We can safely remove all of the tags in the <head> tag as follows:
<head>
  <meta charset="utf-8" />
  <link rel="icon" href="favicon.ico" />
  <meta name="viewport" content="width=device-width, initial-scale=1" />
  <meta name="theme-color" content="#000000" />
  <meta
    name="description"
    content="Web site created using create-react-app"
  />
  <link rel="apple-touch-icon" href="logo192.png" />
  <link rel="manifest" href="manifest.json" />
  <title>React App</title>
</head>
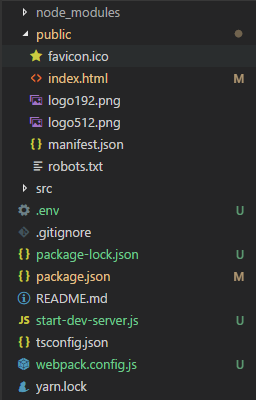
When this is done your changes to the folder should look like this:
We should be able to run the various npm commands now. In order to run our app we first have to run npm install. This will install all dependencies that are defined in the package.json file. This process could take some minutes, since all the dependencies and packages have to be downloaded (if they are not yet present on your development machine).
Once this is done, we can run the npm start command. This will start our application and will automatically open a new tab in a browser (since we defined our dev-server package to do so). When the page is loaded and we make changes to our App.tsx file (or any other component we add to our App), the changes will almost instantly be visible in our browser.
The template also provides a basic test script. We can run the npm test script to start a continuous test process for our app. In this continuous process, the command a will run all tests. Alternatively we could have added this as a third parameter by calling npm test a. If we want to quit the test process we can simply press q.
In the following post, we will look at some tips and tricks when developing a React Application.